How to read guitar tab part two
In part two of How to read guitar tab, we will look at bends on guitar.
One of the most common and unique techniques used by guitar players is the bend. Bends are a great way to change pitch smoothly between a lower and a higher note. To execute a bend, you need to physically bend the string up in pitch by pushing it up the fretboard.
The amount you bend the note can be anything from less than a semitone, right up to two or more tones. The further you bend the string the higher the pitch becomes.
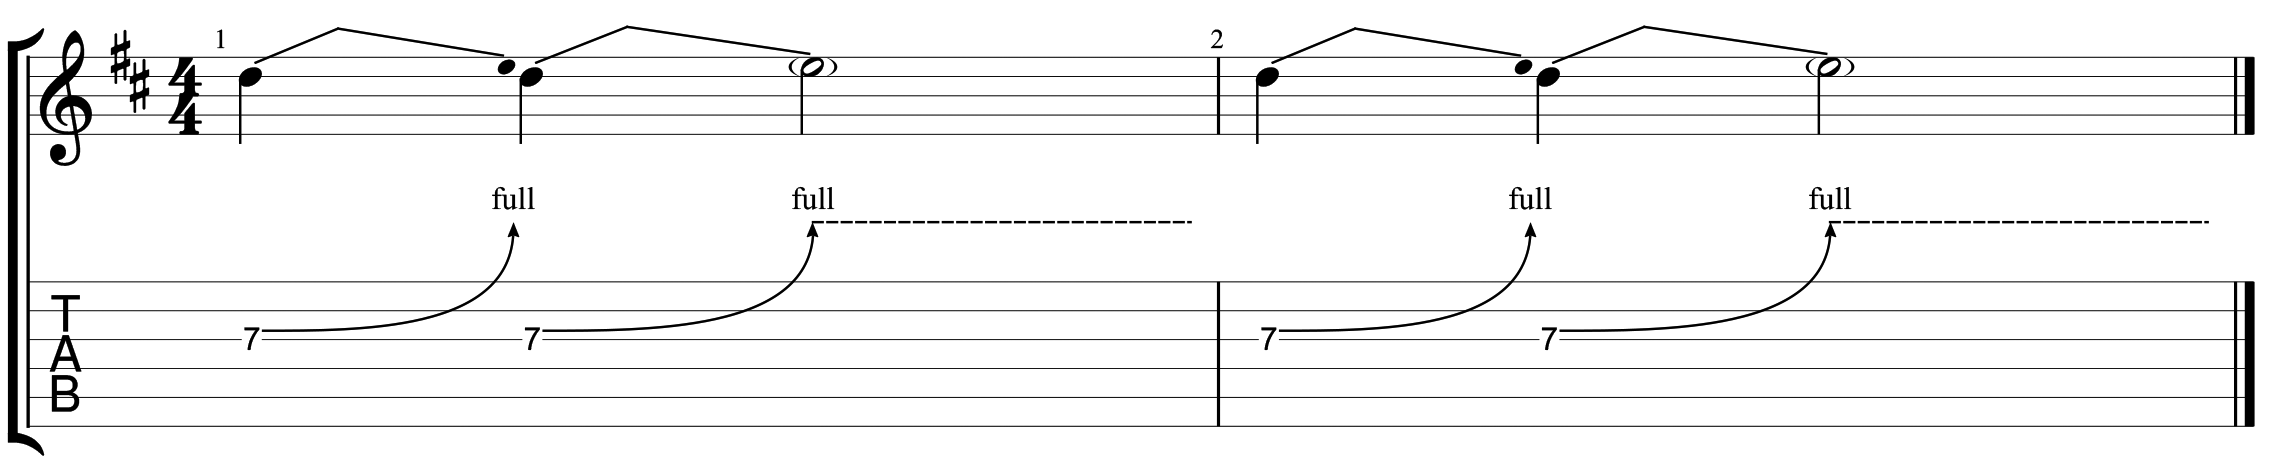
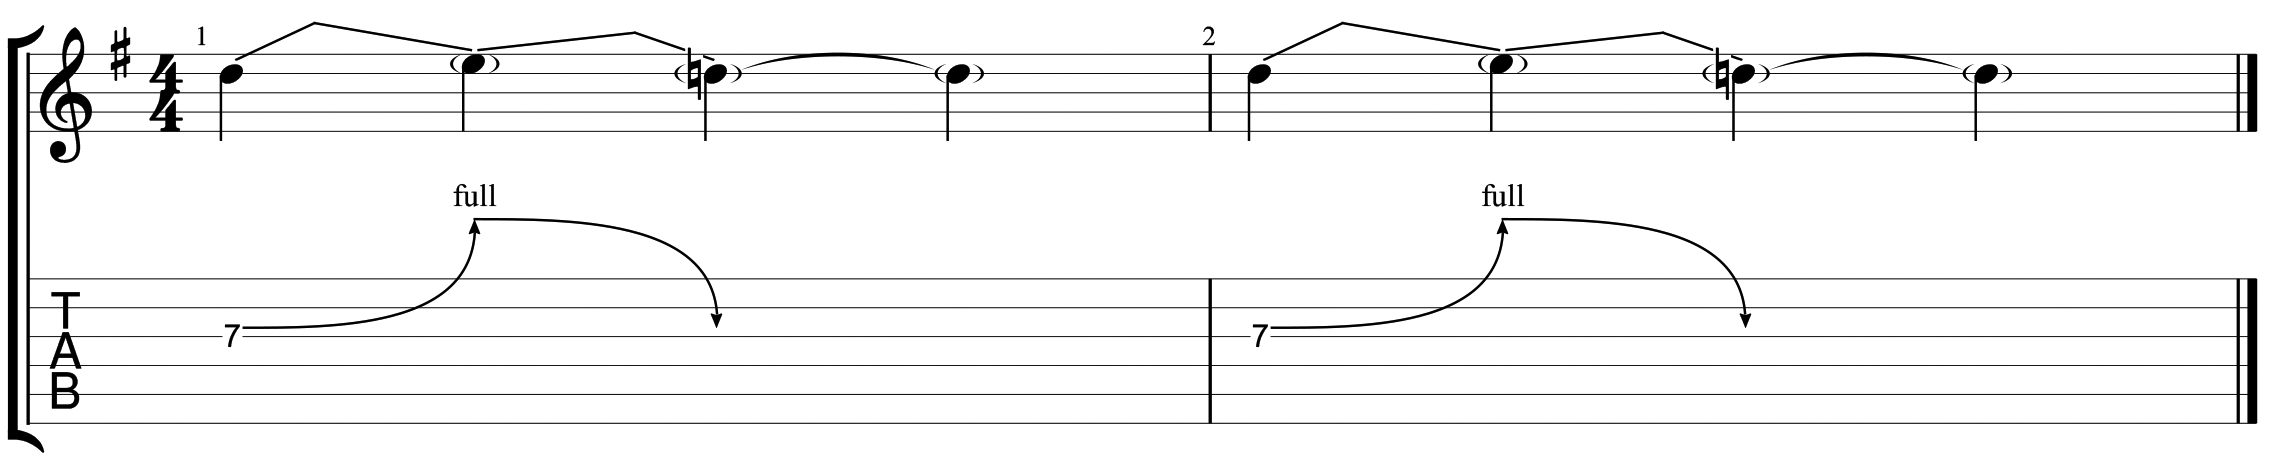
In tab, a bend is shown by curved line with an arrow. In the following example the note on the 7th fret of the third string (D) is bent up one tone, until it sounds exactly like the note on the 9th fret (E).
The word “full” is written above the bend to indicate that the note should be raised by a full tone.
How to read guitar tab Example 2a
The easiest way to learn to bend is by using your third finger to fret the note and supporting it with the first and second fingers, lined up on the string behind for added strength and control. Placing three fingers on the string is much stronger than using just one.
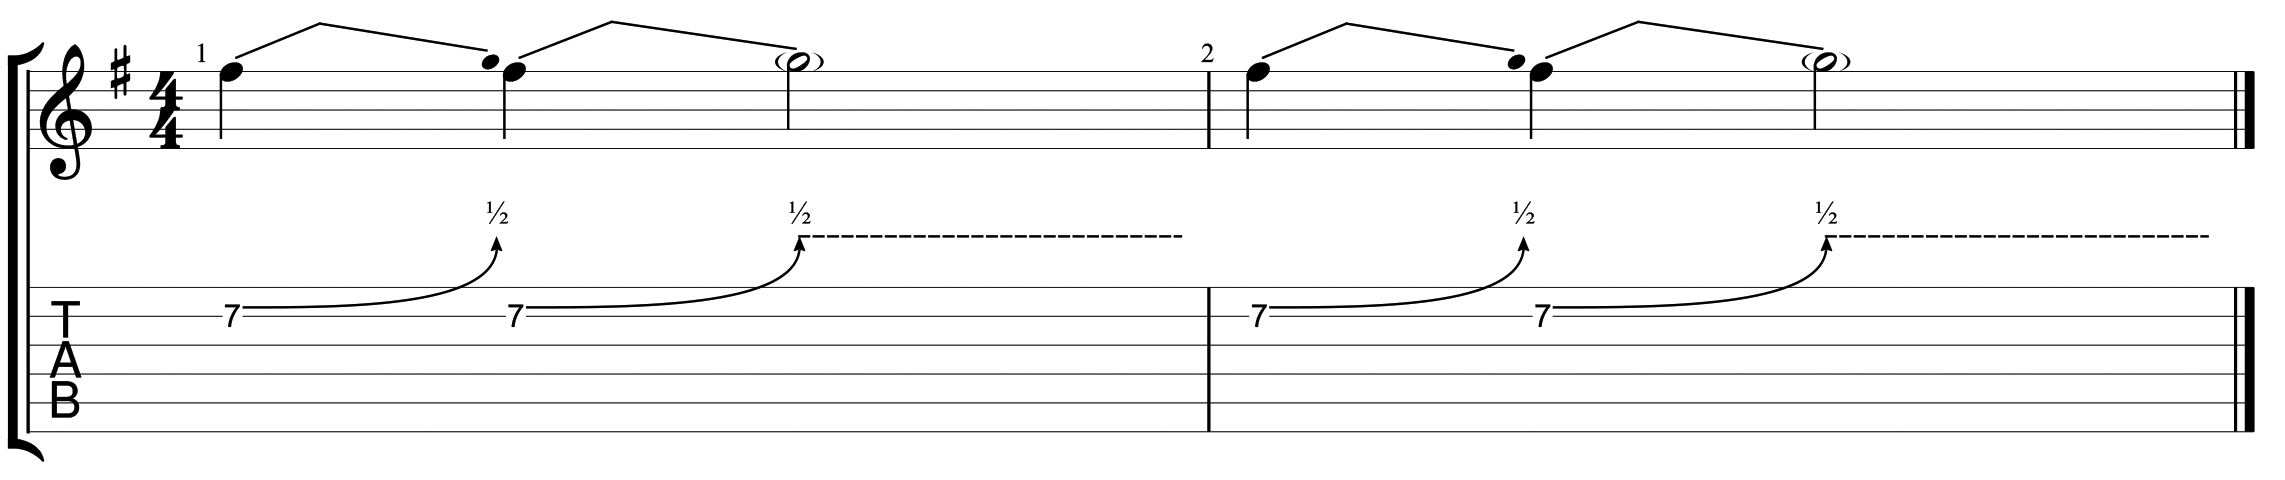
The distance you need to bend the note is always written above the arrow. Other common distances are a 1/2 tone (semitone):
How to read guitar tablature tab 2b
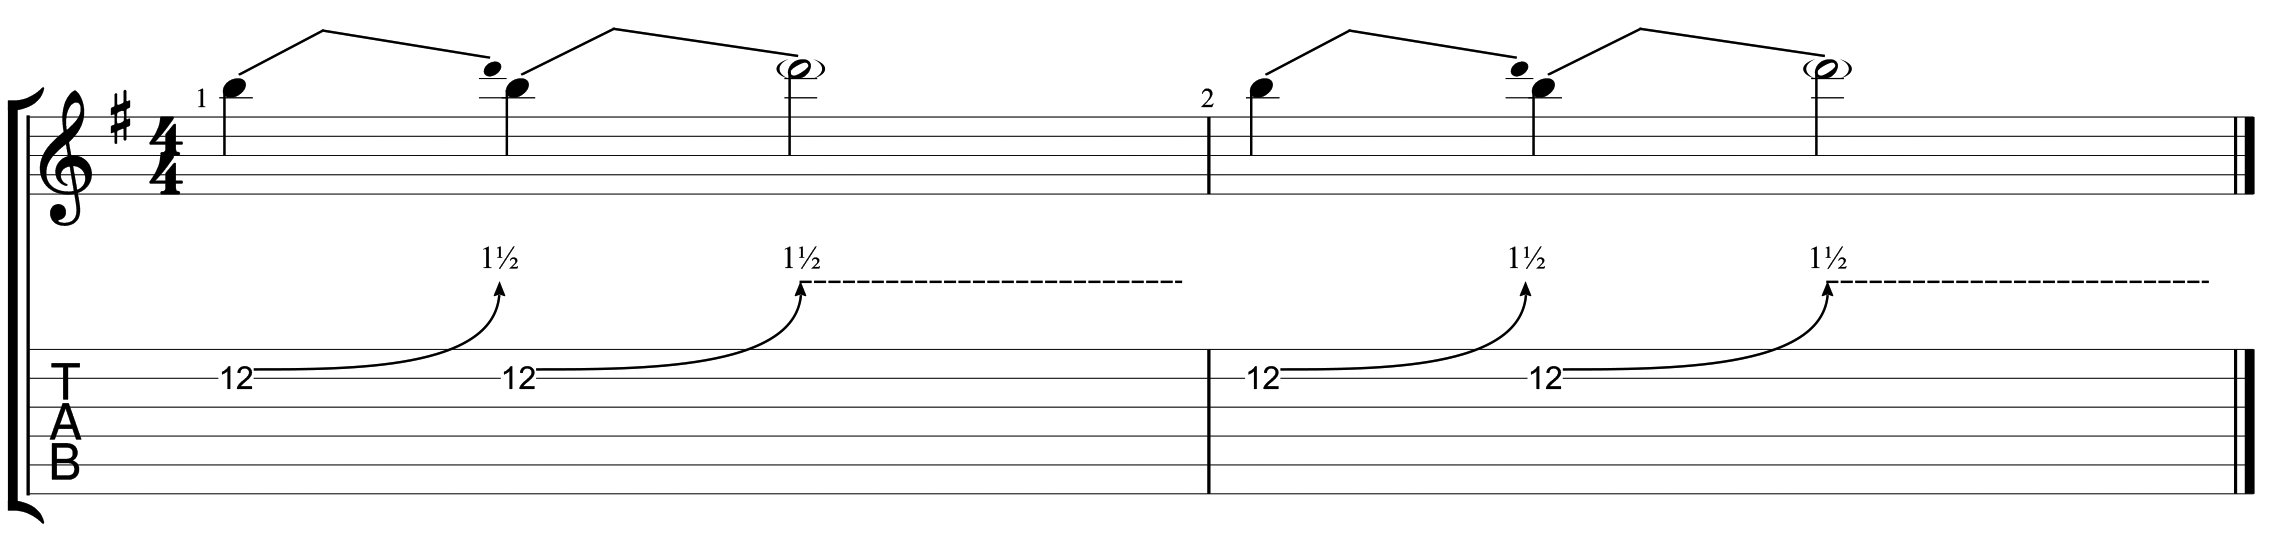
A tone and a half:
How to read guitar tab Example 2c
Or maybe even a 1/4 tone. This is known as a curl.
How to read guitar tab Example 2d
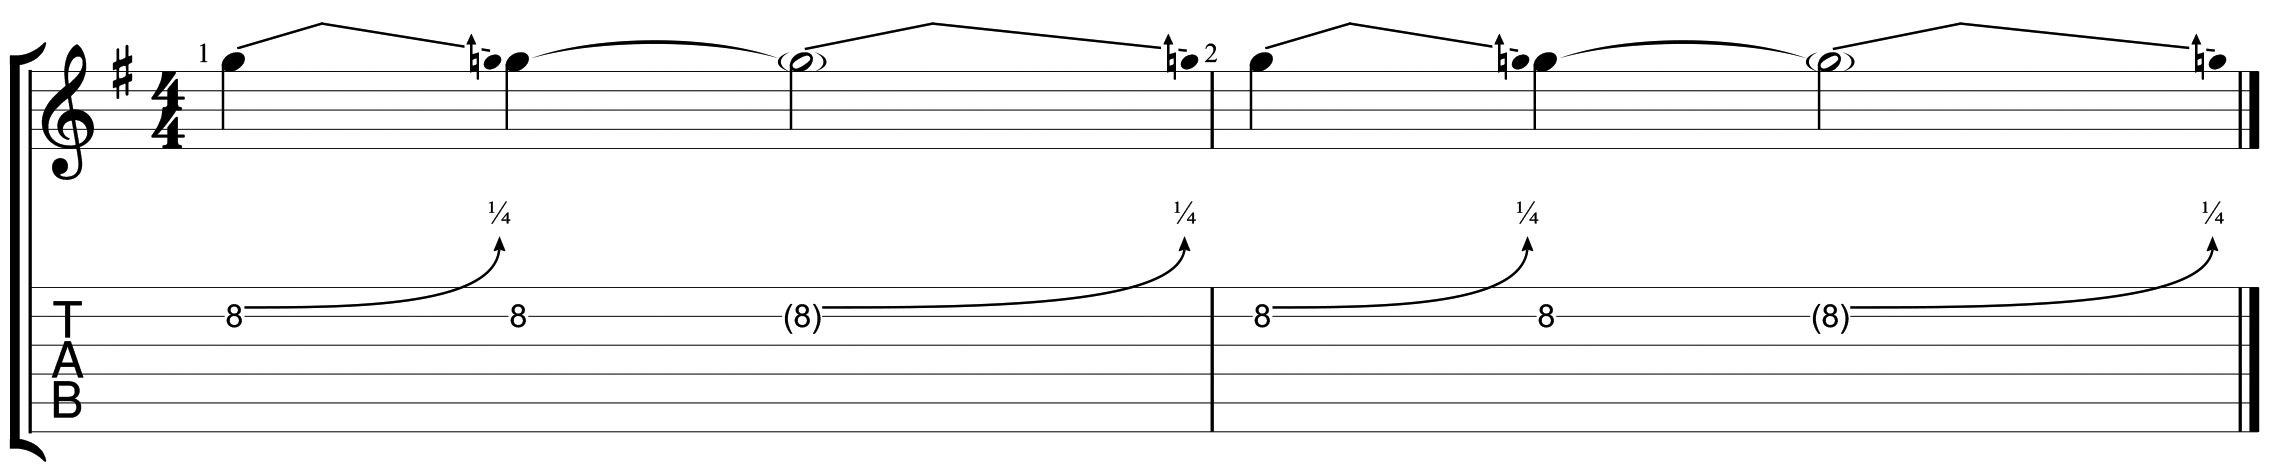
You can finish a bend in various ways. So far, I’ve notated bends that ascend and you don’t hear them descend back to the initial note. If the bend should be held as you move your fingers back to the original pitch, another arrow is added to show this.
How to read guitar tab Example 2e
This lesson is an extract of my new book, How to read guitar tablature that’s out now on Amazon.