Key Changes with the CAGED System
Rock guitar solos often change keys suddenly. By using the CAGED system we can execute extremely smooth key changes (modulations) without being forced to jump from one position to another. This is also what you need to learn to develop the freedom play easily in any key, and any position on the guitar neck. These concepts are some of the most important in the whole book.
This chapter teaches you how to play all 5 Blues Scale shapes in one position on the guitar neck. This is achieved by playing through 5 different key centres: A, C, D, F and G. The concept is to ‘lock’ our hand into the 5th – 8th fret area on the guitar while playing each new key centre in turn.
The first thing we need to know is where the root notes are for each of the 5 keys in that position. In the 5th – 8th fret area of the guitar, the root notes of the keys A, C, D, F and G are located here:
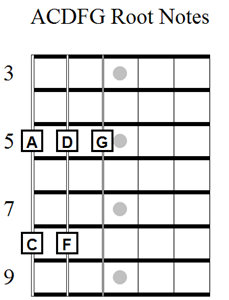
You can see that the note F is located on the 5th string, 8th fret, and G is on the 4th string, 5th fret.
The next step is to synchronise the ‘anchor’ chords (or simply just the root notes) we previously learnt, with each root note of the new key in our chosen position. So in the 5th to 8th fret position:
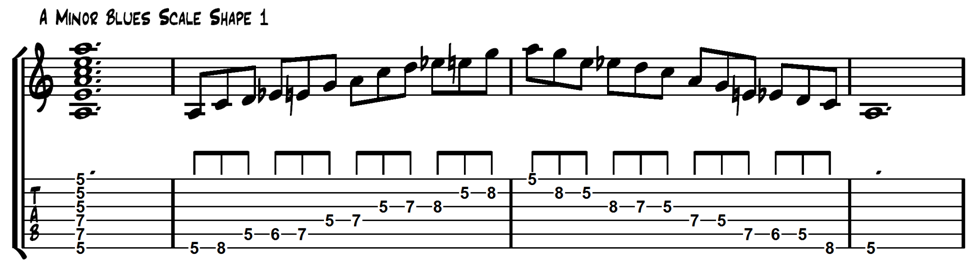
A minor is played with Shape 1
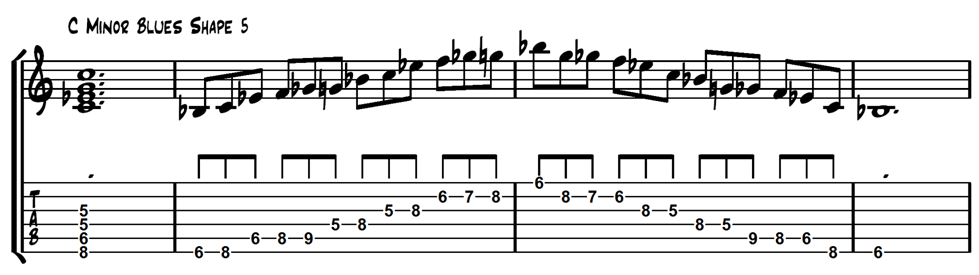
C Minor is played with Shape 5
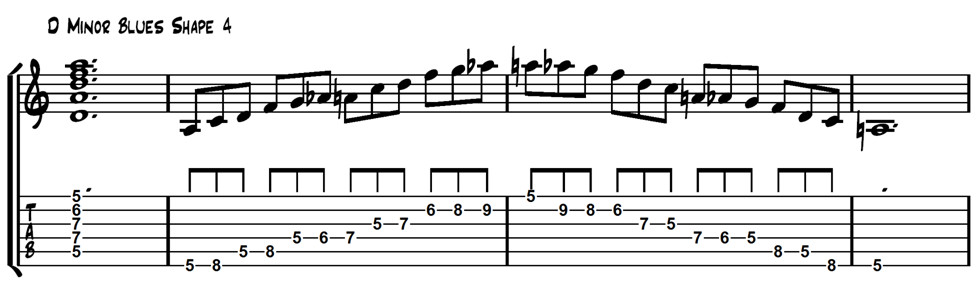
D Minor is played with Shape 4
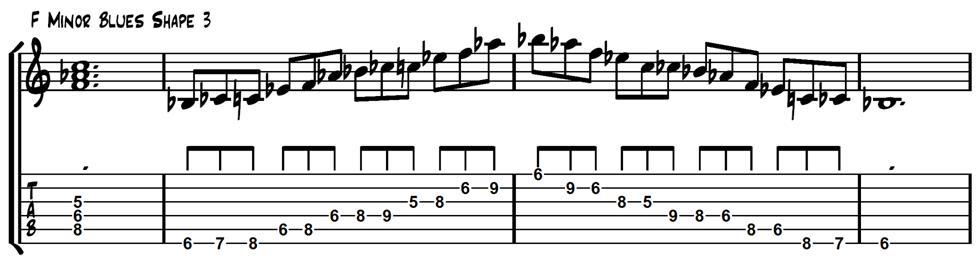
F Minor is played with Shape 3
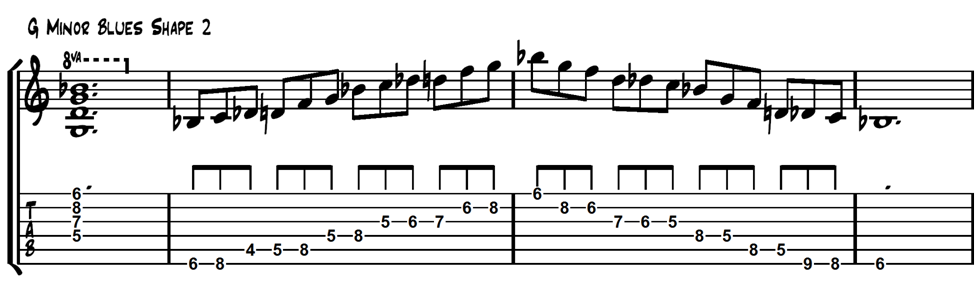
And G Minor is played with Shape 2.

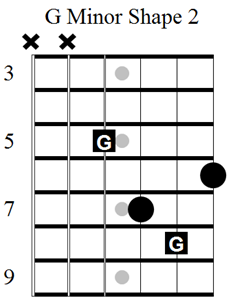
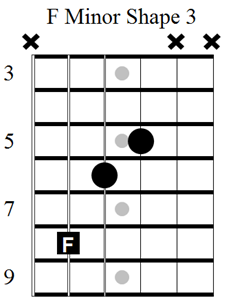

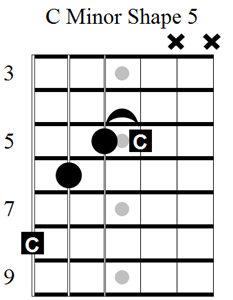
Look to see how the root note of each chord correlates with the root note locations in the first diagram on this page.
Because we have spent time memorising each scale shape around each chord shape, it is easy to see which scale shape corresponds with each key in any position.
The following series of exercises will help you cement not only the location of the key centres but also your chord – scale relationships.
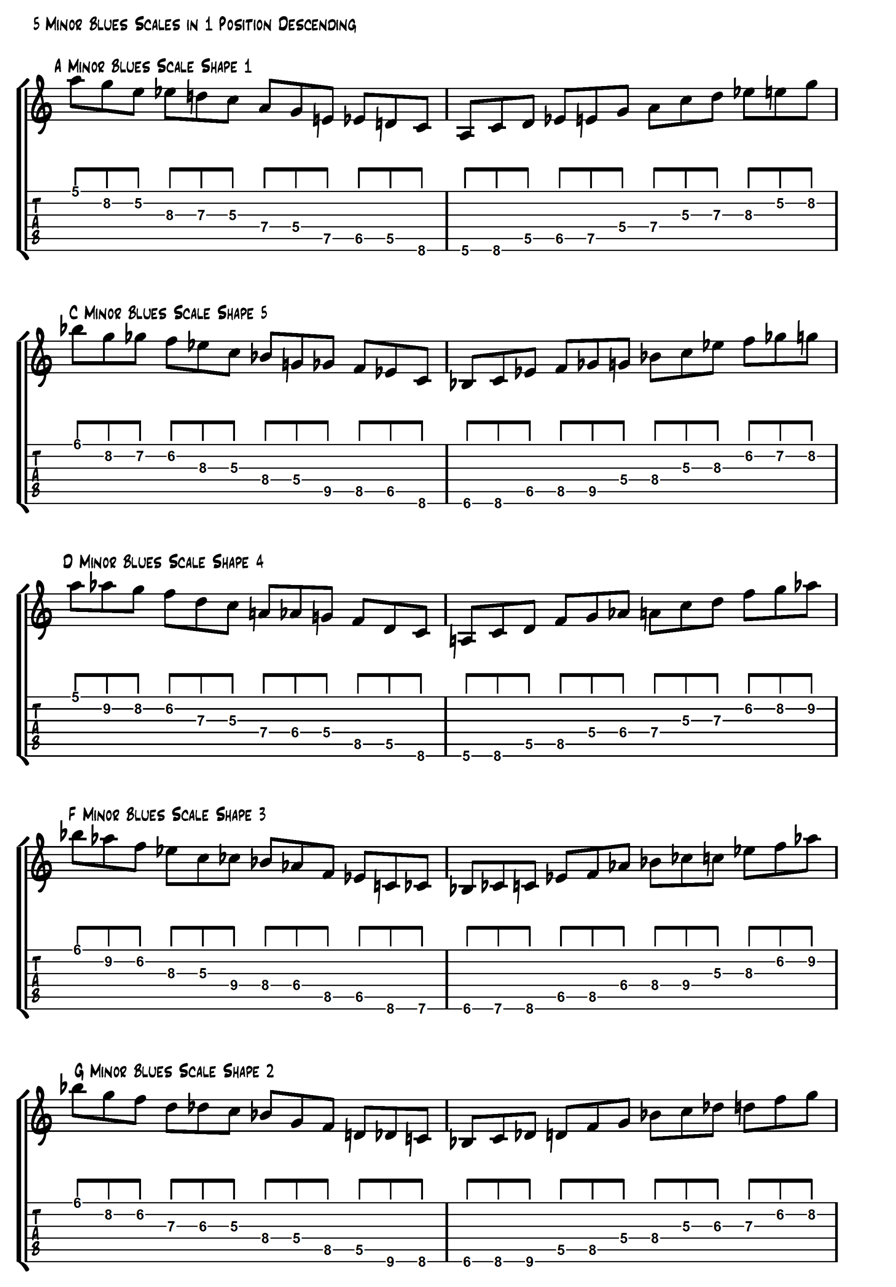
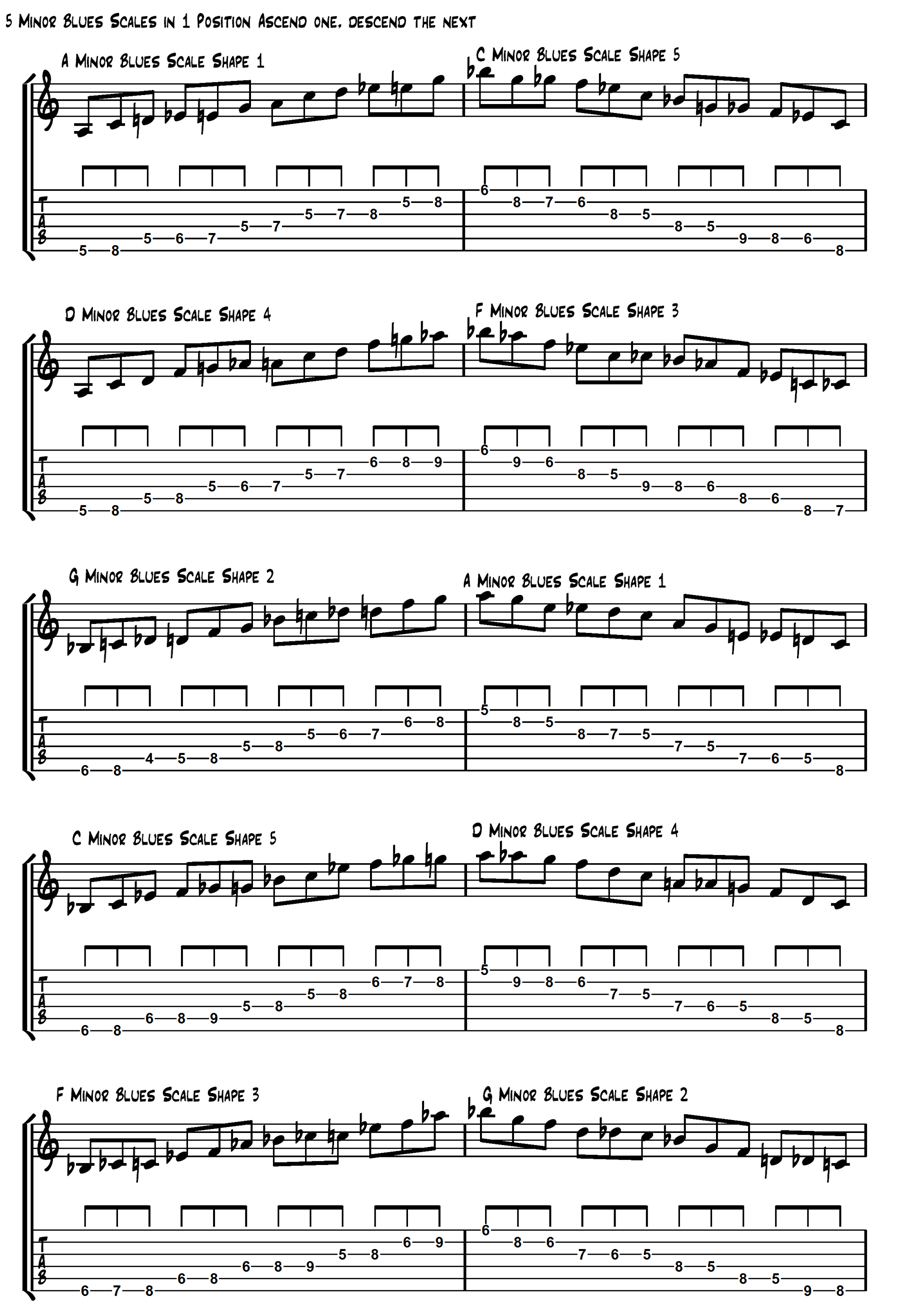
These exercises cycle through the key centers A, C, D, F and G.
Begin by playing through the A Blues Scale, starting with the same chord as before:
key changes Example 10a:
Remember to say and play the chord each time.
Now repeat the process for the remaining keys, C, D, F and G. Occasionally I refinger a scale for ease and fluency. Play whatever feels comfortable for you.
key changes Example 10b:
key changes Example 10c:
key changes Example 10d:
key changes Example 10e:
Remember to say each chord out loud as you play it.
The previous exercises will help you to internalise the chord to scale relationships; however, the next exercise will really start to push you mentally. The idea is to ascend and descend each scale in turn but with no rhythmic gaps. This eliminates your ‘thinking time’ and forces you to visualise each scale much more quickly.
key changes Example 10f:

This exercise normally takes a bit more time to internalise, but when you have it mastered you will be able to play in any of the 5 keys instantly in the 5th – 8th fret area of the guitar.
To further reinforce the shapes and to help you extend this visualisation exercise, learn it with the scale shapes descending as shown in
key changes Example 10g:
Finally, ascend one shape and then descend the next. For example, go up the A Blues Scale, but come back down the C Blues Scale. It will take 10 cycles to come back to the beginning as shown in
key changes Example 10h:
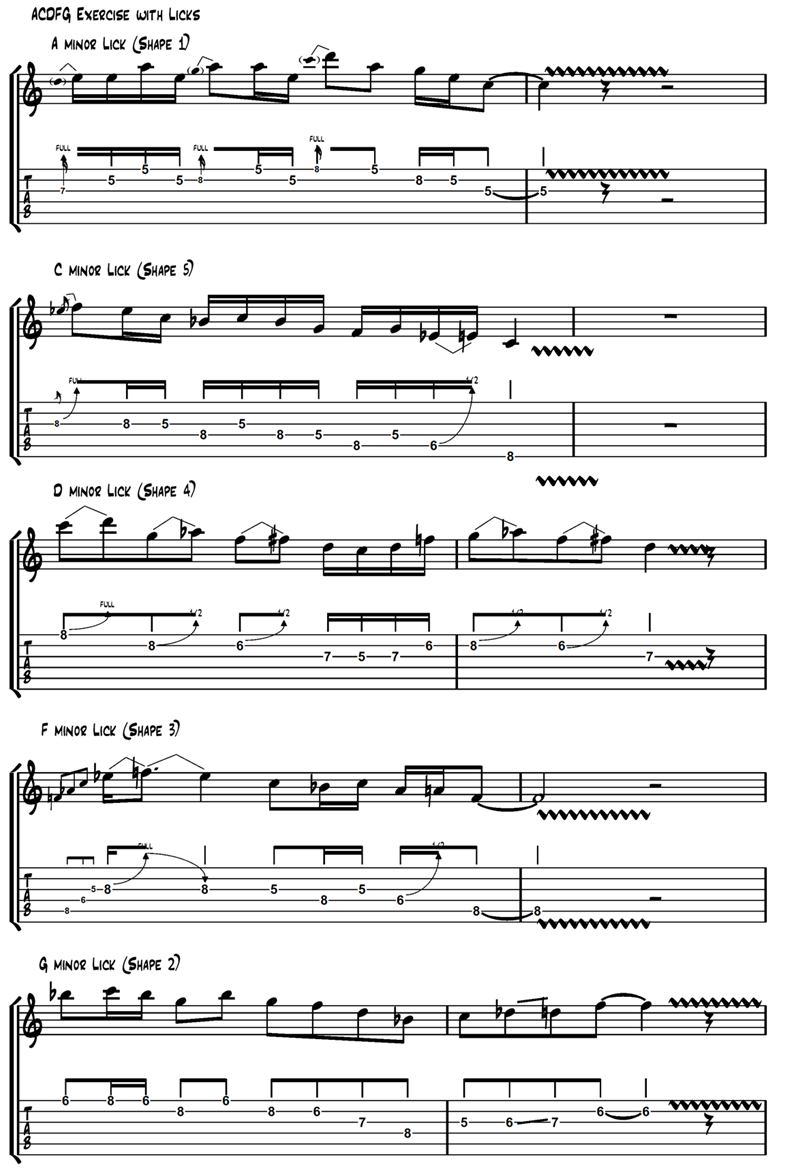
These key change ideas are extremely powerful when it comes to visualising and unlocking the neck; however, they’re not necessarily the most musical application of the concept. Our final exercise travels through the 5 key centres but this time, instead of playing the appropriate scale, you will play a lick which is based on each scale shape in turn: one for A, one for C one for D etc.
Begin by learning this exercise with the licks I have written as they are shorter and leave you time to think about the key changes. When you can play through it comfortably, practice it over backing track 1.
key changes Example 10i:
I suggest that you then try the same exercise with different lines: Pick one new lick that you have already memorised from each shape and that you find easy to play. Repeat the previous exercise with these new licks and visualise them around each anchor chord as you play them.
Finally, try freely improvising over the same backing track, spontaneously creating licks and changing scale with the backing track every 2 bars. This is a fun, challenging and rewarding use of your practice time.
